January 29, 2017

Where's that Wedding Dress?

Jo and Andrew on their wedding day.
Jo is wearing her  lovely Nordstrom dress and the
antique necklace, given to her by
Andrew's grandmother
Some of you may be wondering: What the heck are these posts about a craft room remodel? I thought you were making your daughter a wedding dress? Remember? Knitting it? Last year?!

Well, in the words of Miss Elizabeth Bennet, "Things took a little turn...." and while Jo and Andrew still did get married (unlike Lizzie and Mr. Collins), there was little -- a very little -- extra something that came up early on in the wedding discussions.

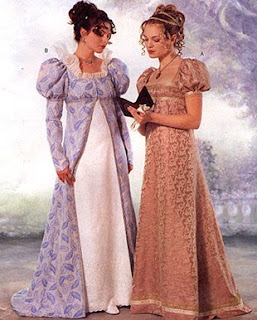
Jo and I went back and forth on the wedding dress. She declared that her figure was changing every day and she didn't think she'd be able to wear the knitted dress. I found another dress pattern -- one that could be sewn instead of knitted -- for the sake of speed, and the style even had a charming history of being made famous by Josephine Bonaparte during the Regency Era, which was, of course, Jane Austen's time. Rumor has it that Empress Bonaparte created the empire waist style to hide a pregnant figure; and it became all the rage.
The pattern! I may make myself one of these!

Jo does want me to knit the rest of the dress. She and Andrew are planning a future renewal ceremony and she says she will wear it then.

In the meantime -- and for practicality -- Jo purchased a dress at Nordstrom (actually two dresses, in case the first one didn't fit by the wedding, then the second one would stand in!). In the picture above, she is also wearing an antique necklace that belongs to Andrew's grandmother. (And isn't Andrew handsome?)

They are now cozily situated in their first home in the Seattle, Washington area and loving being parents! And I am loving being a grandma. Who can argue with this little face?

Baby Ethan is sporting a
Gabrielle Danskknit design, test knitted by me,
just for him.


January 28, 2017

Tiny Pails!

Now, many months later!

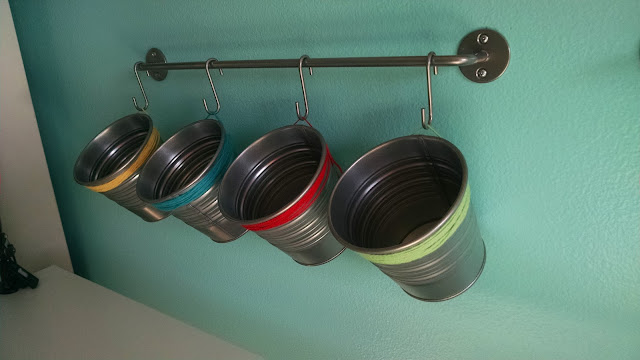
These pails on the the craft room wall were a Pinterest find (You can find my own Craft Room Remodel board here). In fact, I will be posting my projects to Pinterest when I am done with these DIY posts, just to add to the plethora of similar projects already posted there. 

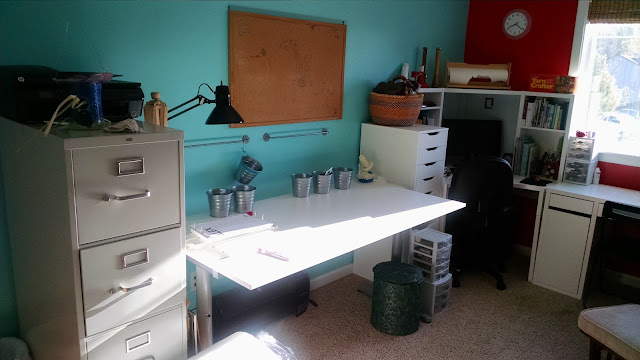
For the pails, I used "50 Clever Craft Room Organizatoin Ideas," found on the DIYJOY website, found on Pinterest. It turned out to be a jumping off point, really. On one of our multiple trips to IKEA (As many of you are painfully aware, you are obligated to make multiple trips when you are building a lot of IKEA furniture, whether you want to or not; turns out there are often missing parts in the furniture kits. IKEA even has a department for missing parts!! I think it's a ploy to get you back -- and back -- into the store!) we noticed the SOCKER "plantpots" for .99.  These were a lot like the pails I had seen on the DIYJOY site and thought these were a steal! We then set out to find a rail and something to hang the pails on, so they could be filled with adorable crafty items! 

After spending quite a bit already, we were feeling pretty cheap at that point in our week-long craft room remodel. Some of the rails and hook systems, when added up, were a bit much, we thought. We walked around more and wandered into the kitchen section where there are a lot of little things in bins, maybe not even on the website, as is the case with our rail. I cannot find it on IKEA's site, but they were only $2.50/rail. Not kidding! So, we purchased 2 rails, a package of S-hooks (again, these were kitchen area finds and not found on the site! They were $2.50 for a set of 10!) and 8 SOCKER plant pots at .99/pail for a grand total of $15.42. I thought that was a pretty good deal. 

It pays to wander around. 

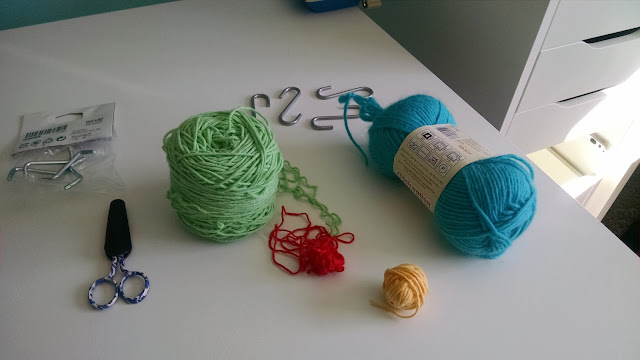
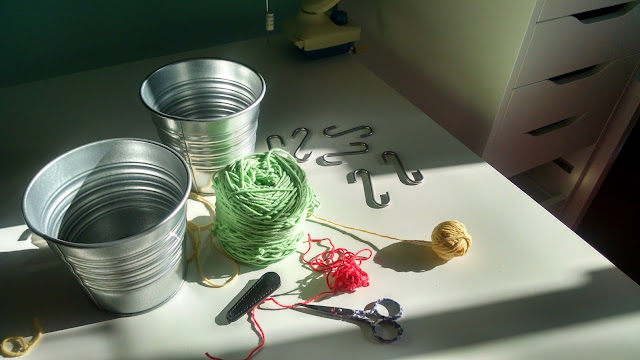
I still didn't have a way to hang my pots onto the S-hooks. I thought about drilling a hole in each pot, but then decided against that. I don't have the right tools for the job. Instead, I chose to use some scrap yarns in bright colors to wrap the tops of each pail. Can't lose, I figured! If it doesn't work, I can go back to IKEA and buy the specialized hook things for the pots, like these or these! My yarn wraps are secured with a simple knot. Then, I inserted an S-hook into one strand of the yarn, pulling it out a bit. It was a little tricky to make sure they looked even on the rails, but I like how they turned out. 


Scrap yarn and pails


Putting S-hooks into a single strand of yarn

Find stuff to put in your pots!


We realized after hanging these that the pails were right on the freshly painted wall! In order to keep the pails from scratching my new paint, I cut out little wedges from some of the felt circles that came with the IKEA furniture (we didn't need them as we put all the furniture on carpet) and stuck them to the bottom edge of the pails.


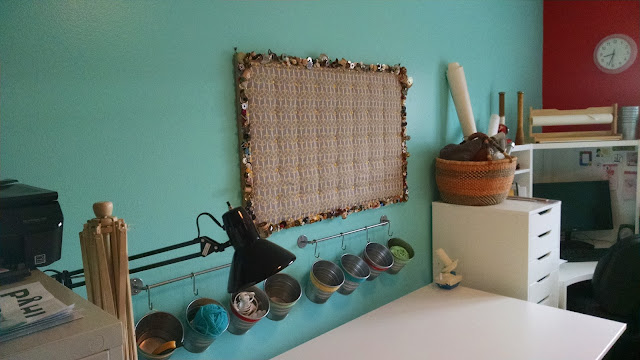
And there you go! Hanging pails -- with no plants in them! I love these little guys so much that I bought 7 extra ones to organize tiny things when making projects! I keep my swatches in them. They double as coasters for hot coffee mugs in the craft room!


A friend of mine picked up these old spindles from Pendleton Woolen Mills in Milwaukie, Oregon as a suprise! I love
their antique feel! And the painting on wood was done by my daughter, Annie, who took an art class last summer from our
good friends Curtis and Michelle. Curtis' own art can be seen here and here! If you are local, check him out in
Portland, Oregon!


January 25, 2017

Bonus Post! A Room of my Own: The Bulletin Board


Jewelry making supplies from
my daughter's mother-in-law
In the interest of catching up, I have decided to try and finish up the posts on the craft room remodel this week. So here is an extra post! I hope you all don't mind!

I have a lot of weird things given to me -- sewing notions, old yarn, old pieces of upholstery fabric. Once, I even received an offer to take a partially made afghan. The woman's sister had died and she didn't know what to do with it. She thought maybe I could finish it? She produced some painfully old and dusty crocheted strips (Incidentally, they were very nice work) in purple and green. My crochet skills are not to that level, I was able to say, plus I didn't have the heart to tell her that an afghan takes an incredible amount of time to complete!

Grandma Miller's buttons, along with
some thread given to me recently!
While I did not take the afghan project, the truth is that most of the time, I do not refuse items such as these. You never know what you might do with them. The possibilities seem endless. Plus, I grew up with an old Finnish farmer for a father who lived through the Great Depression. He does not throw ANYTHING away. That man has old boards -- older than me -- on his covered patio that he refuses to get rid of. And there is so much more: old nails, pails, bricks, nails stuck in wood, garden spikes, old tomato cages and anything else he is secretly holding.

Oh, and let's not forget the circa 1960's water skiing boat on the side of his house neatly stored on a poured concrete pad. It has been outside, on a trailer and with no cover -- all of my life. Once he had a wife, then kids, the skiing went out the window. Apparently this was too frivolous for a serious baptist family. He is now 85 and the boat is a lost cause, which he will not give up on. No intentions of restoration, either. "Someone will pay a lot of money for that boat!" He says. Then I say, "Yes, me. To have is hauled away." I say this only to myself.

But I digress...

My father keeps everything. He is a keeper, not a hoarder. I think some of this rubbed off on me.
I am pretty sure my dad's boat would look like
this if it had been cared for.

At work recently, a patient brought me 2 huge old tins of sewing notions left to her by a great aunt who had recently passed: pins, hat pins (some rusty with tetanus), trimmings and buttons. Oh! How I love old buttons! Some were strange and some were lovely and antiquated, some were antiquated, but useless due to damage. All were slightly scratched or tarnished by rubbing against each other for years in those tins. And when you washed them, a curious green film came off onto your hands. I hope it was from tarnished copper buttons living in the tins with the other buttons...

I happen to also have some button tins of my own, left to me by my grandmother, Grandma Susanna Miller, who died at 92 years of age when I was 25. That was in 1995. I usually don't even dare to think of using my buttons for fear that once I do, they will be gone forever. I generally can't bear the thought. It's like losing her all over again.

So they stay in their tins--without mysterious green residue.

After looking and looking, and handling and examining the buttons from my patient--and washing my hands with Boraxo--I had an idea. The old, crappy corkboard I had in the closet could be made over. I was keeping this for a few years after Alex left home and moved to Bend. Like my father, I thought I could use it.
Note the fabulolus art work on the cork. It was just too big and, I believed, too useful to throw away!

The cork seemed a little dry, if that is possible, and there was kid writing all over the board. I popped over to the fabric store, got a little piece of clearance fabric with a sewing theme. I had a little bit of batting. To the two old tins from my patient, I added some old broken jewelry I had, along with some old jewelry and beads given to me by my daughter's mother-in-law, and yes, a few of my grandmother's buttons.

This made a fun assortment of things that resembled a scene from an Eye Spy book.

I pulled out some very old bias tape from my grandma's stash (I have a lot of her stuff--I was the only granddaughter and loved to sew with her!) and whipped out some paper from a roll I originally bought (from IKEA, yes, my shame is great....) for the kids to draw on. Now, it was for a little pattern drafting.

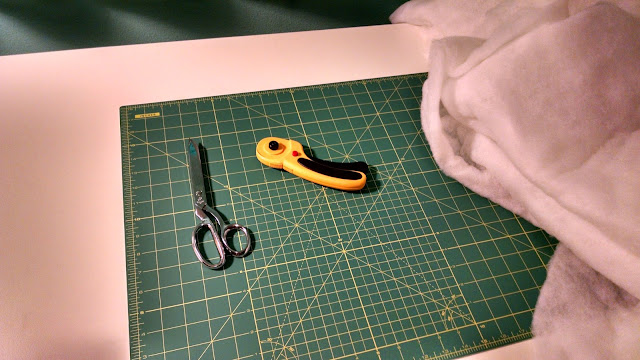
I measured the stinky teenage boy bulletin board, just the cork part. Then, I used a cutting wheel to cut out a piece of batting. I drew a rectangle on the paper, with a small seam allowance for the fabric. I thought it would be a nicer finish if I hemmed it and I added the biased tape to the hem for stability.
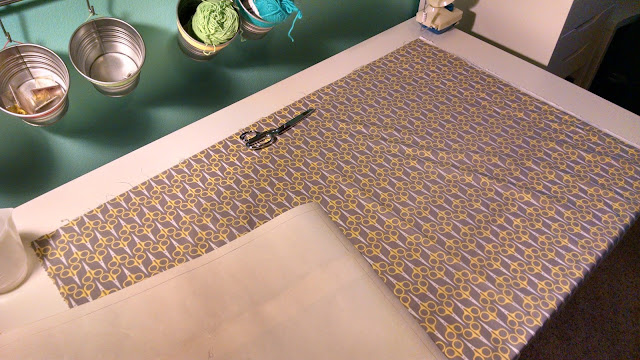
A roll of IKEA paper and some clearance fabric from JoAnn's

You quilters have some very awesome tools!! I had to have a couple--and I use them all the time!
A perfect cut from the scary sharp cutting wheel!

Grandma's bias tape. I won't even venture a guess on how old this is.
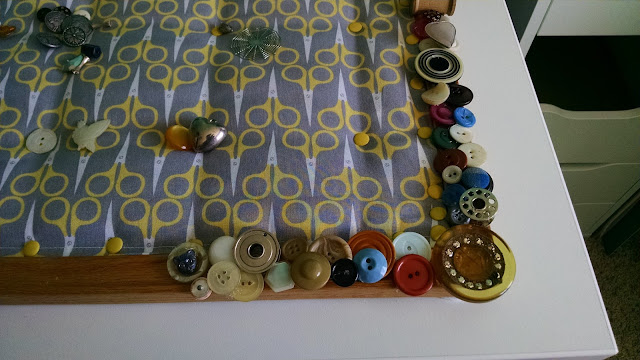
So much to put on such a big frame!! Get the hot glue!


The large, yellow button on the lower right corner is beyond repair or use for a garment, but it sure is cool!

The scotty dog was my favorite brooch as a child. I used to wear it on my coat. His back broke off long ago, but I couldn't bear to part with him. 

All done! I feel like there should be a list of things to find on this thing!
Can you find:
20 wood spools, a metallic dog, a broken key chain and a little green frog (at least, I think there's a frog). 100 white buttons, a silver web, an old belt buckle and 5 spools with old thread.

I had not really planned out how I was going to secure my cover for the ugly bulletin board, so I thought about how cute upholstery pins are. I went to the local hardware store and found some odd yellow thumbtacks. They matched my fabric, why not? So I brought those home and pinned them all around the board, securing it to the corkboard. It didn't look quite right, so I measured out little boxes with a clear quilting ruler ( I don't quilt, but I love their useful supplies!) and put the yellow tack on the board, "quilting" it.

Then, came the hot glue; tons and tons of hot glue. I enlisted my patient daughter, Annie, who is a student at the Vancouver School of Arts and Academics (VSAA) to help with placing and gluing all the tiny items onto the frame of the bulletin board. She has a good eye for composition!

This part took quite a while. I even had to buy a new hot glue gun--plus a lot more glue sticks. Mine had never seen so much action in all its years with me combined and it got so sticky that it became unusable.

When it was done, it looked more like a walk down memory lane -- my memories plus the memories of others. It doesn't totally match my craft room concept, and maybe someday I'll pass this project to my daughter Jo, who longs for a room of her own and make a bulletin board that more matches my 50's kitchen concept. Or maybe I'll change the fabric and add more red to the frame -- there is room.

But for now, I really enjoy looking at the new bulletin board and taking a little walk down the lane of memories.
Before

After!


 Next, we'll talk about those little pails on the walls--yes, they are from IKEA.

A Room of my Own: Furniture

After all the coats of paint were dry--including all the Q-tip dots I made with white paint all over the ceiling to cover the red splatters--it was time to build some furniture. Months earlier--when we were working all this out--I purchased a large, adjustable, white craft table at IKEA and I really liked it. So we were planning to match everything to that. Plus, I loved the clean lines and the white energy against the brightly-colored walls of the room. Something about white in a craft room always makes me happy!
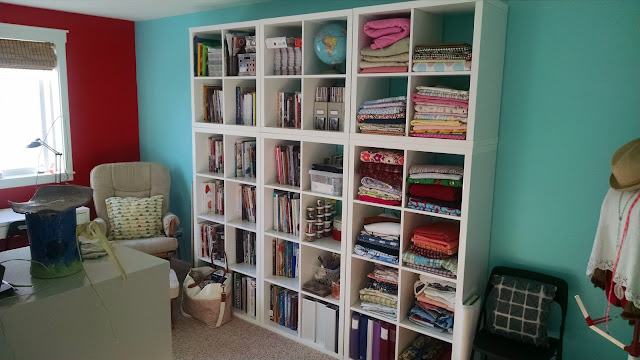
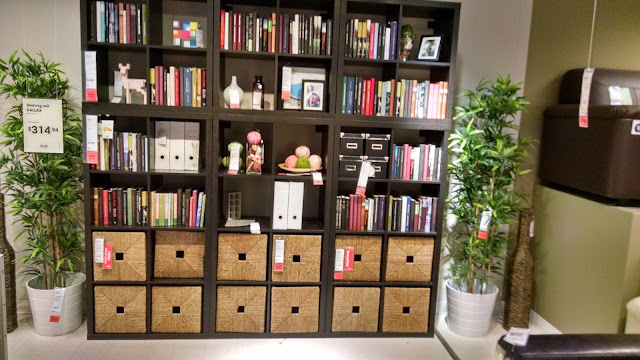
These shelves were our best fit -- and price. We used a 4-unit bookcase stacked on an 8-unit one. Fit just right. And it left enough room between bookcase and ceiling to store little photo boxes on the top. We also took the time to secure these to the walls, of course! The finished product is about 8ft/2.4meters high. With this set, I was able to store my fabric, books and binders easily...until I buy more books, that is. And yes, I got sucked into buying those little black folding chairs, too. They are so cute!


The table was called GALANT  but now has another name. I had it for two years before we even did the rest of the room -- how time flies. I love the corner workstation and desk! I had to watch out for the left/right thing on the desk. Got a little confusing.
My hubby and I headed to IKEA to get the furniture we had planned for 2 years earlier: a corner desk for the computer, a sewing table/desk, and some book cases for one wall. For the bookcases, we went with the KALLAX series. (Why does IKEA do everything in ALL CAPS? It always  feels like they are shouting at you, even from the freeway as you see their sign!)

In case you are thinking of bookcases for craft storage, consider this: a while back, we found a huge set of the BILLY series on Craig's List (for pretty cheap!), and thought we had struck gold. That is, until we looked at the dimensions. Be careful that your bookcases are deep enough to actually hold books, binders and craft supplies, or anything else you plan to store. Do you want to fold fabrics on the shelves? Stack boxes?  Measure your stuff! I was surprised by how deep my books were compared to the bookcases.

The little ALEX chest of drawers can be found here. It turned out hold a lot of notions, trims and extra crafting supplies. I even have a knitting drawer in it! As you see, a lot still needed to be done. 
The BILLY series is only 11"/28cm deep, which was not going to be enough room for my supplies, at least not comfortably. A little shopping early on revealed that KALLAX was going to be the best price for us, as well as 15 3/8"/38cm deep, with plenty of storage room.

A little more measuring of the room helped us pick up a corner desk, the MICKE corner workstation and the desk, which has a hole in the center--probably for a computer, but I put my sewing machine cord in there.

I know this is sounding like a commercial for IKEA, but it was so easy to make everything fit! Plus, we made a day of shopping! There's a Starbucks nearby at Cascade Station. This was made more exciting by the fact that we spotted Trailblazer Lebron James -- though we had no nerve to approach him!

Why are we looking at couches?! It must be the IKEA trap.

The one! I was trying to save some $$ and so did not buy the drawers, but it also worked out as they would have been
useless to me. It paid to be patient!

The table, now called BEKANT! What th-?! Does it even matter?! What ARE these names?

Mommy, Daddy...I really need a desk. Yes, she got it. Sigh....and no,
she does not do homework there. 


January 22, 2017

A Room of my Own

My mantra--I've had this magnet on my fridge for some
time! Turns out it fits into my Craft Room decor now!
This is normally the time of year where I talk about how I have failed to post, what I have done, etc. Well, this year is mostly no different. However, quite a bit has happened over the last year, and while I usually gloss over past events and focus on only the current ones, I will not be doing that this time.

Instead, I intend to take some time to catch up on the blog. There are a lot of things I'd like to share, and I hope you will feel it is worth it, dear readers. Along with life/knitting events, one additional thing I intend to continue is The Sock Project. (You will be able to single out those posts as that name will be in the title). But for today, let's start at nearly the beginning: what I did over last Spring Break.

It turns out that Virginia Woolf was right: having a room of one's own truly is amazing and wonderful; and it is all the more glorious when you have waited 28 years for it. We now (finally!) have only 3 of our 6 children living at home, leaving one bedroom free. A guest room, you say? I think not. A craft room it was.

So, last April--after many months of discussing how to do it--my husband and I set out for real to create a special room for me in our home. Oh, I had been using the room for a little while already, but with weird, odd and end furniture. Not to mention that the room had a strange, musty feel, as though it was always dusk in there. Now it was going to really feel like my room.

My new room has been a marvelous getaway in my own home, the place I go after work and waaaaaayyyyyyyy too much intense human interaction. In fact, it sometimes feels like a vacation when I am in here! (Of course, I am in the craft room right now...)

The next few posts will be the story of how we did it, and will hopefully contain a few good DIY tips along the way. Let's get started!

Jolene's mural, done around 2003. She is now 28 years old and has not lived at home for 11 years!
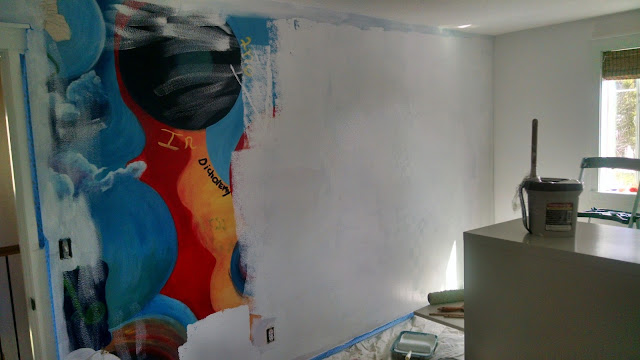
To begin with, the room we used had survived two teenagers. It first belonged to our oldest daughter, Jolene, who is an artist. She is our free spirit, with a BFA in dance and a love of visual art as well. Back about 14 years ago, she painted a mural on one of the bedroom walls. It took her several weeks to complete and meant a lot to her; in fact, it took me quite a while to finally make the decision that it would not truly be MY space if I left it up. So, I took some nice photos of the mural and intend to put them into a special book for Jo. Then I had the daunting task of covering multiple layers of acrylic/latex and some oil paints, along with a healthy dose of teenage angst.

A triple layer of KILZ did the trick and brought the room back to its original very drab self. It also revealed the red "mistakes" that were all over the ceiling and floor moulding, leftovers of the mural and of another wall, which at one time was fire engine red.

Sad, but time to move on!
When my son Alex inherited the room once Jolene left for college, he hated that red wall (mostly because my daughter had painted the outline of a girlfriend on it, and it was just plain creepy). Alex requested that it, along with the non-mural walls be painted white. Now, those white walls were dirty with years of stinky teenage boy.

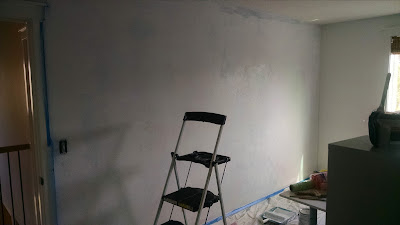
Covered! Whew. 3 coats of KILZ

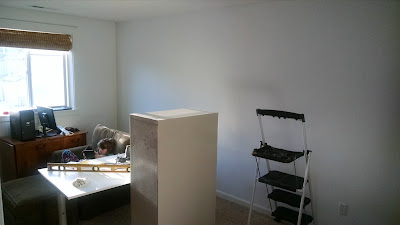
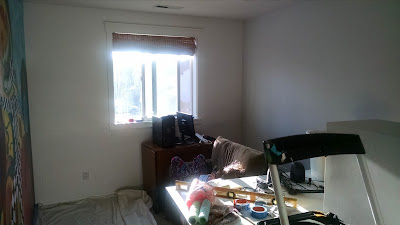
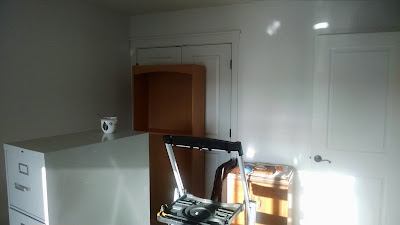
The filing cabinet and a couple of the white walls. Also, note the bamboo
shade in the window. Not at all conducive to my 50's theme.

Morning always bring me strength and determination! Anything seems
possible!

Notice the coffee cup -- always at the ready!
In the early morning of the day after the KILZ completion, I contemplated. Colors, themes... I realized that my hubby and I had not really done a very complete job of planning the room. We really had a rough sketch for IKEA furniture and a budget, but had not gone much farther than that. I thought about how drab the room was...like an old office space lost in time (except for the red splatter here and there). It even had an old, dead taupe-colored filing cabinet, given to me by my mother-in-law. It was so useful...and so plain.

I decided the room needed energy, and I had only one week off work, so I hit the paint department at
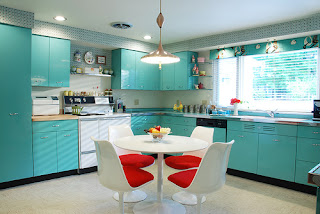
Inspiration!
Home Depot. I had recently been doing a little research into the 50's era for another project, and had been charmed anew by the decor and clothes of the time. I decided to use 50's kitchen colors as a jumping off point, as weird as it may sound for a craft room. but I love the robin egg blue and the cherry reds of the time, so I decided to go for it.


More next time! Stay tuned!

Here is a tiny sneak peek:


January 21, 2017

The End of Betsy's Stalking.

Meeting a knitting hero!
I continue to work on the Wendy Johnson socks -- the heel has me slightly confounded at the moment. Truthfully, I was confounded about 3 weeks ago and put them down "for a minute," and have not picked them up just yet. They are sitting next to me right now, keeping me company. Nagging me, really. The live stitches on them have been moved, however, from my addi turbo circulars to some Knitter's Pride Dreamz circulars. I was irritated with the tiny needles and blunt tips. And when a girl wants some stilettos, where does she go? The yarn shop, of course.

On a very rainy Sunday afternoon, exactly one week following my last blog post, I headed to the fabric store. ( I know -- I said the yarn shop. I will get there. Promise.) I needed Easter dress patterns and fabrics for me and my daughters and oh, WOW were there some serious coupons that day! I took Amy Rose, my 7-year-old with me to occupy her while daddy worked on the car in the garage. 

The garage, complete with a "Tailgater" radio, loads of tools and shop towels all over the place and one swearing daddy is no place for a first grader. 

We set out on our fabric adventure. 

Amy Rose and I spent over an hour at the magical fabric store. Just like newly dyed yarn, there is something about the smell of new fabric that calls to me. Mesmerized, I follow it all over the store, my nose leading the way. With each new colorful, fragrant row, there are new enchantments. If the Pied Piper were made of new fabric, I'd follow him to the ends of the earth. 

At the fabric store, this fantastical journey with the piper always ends in paying him. I gave my due to the young lady at the cash register and the spell was broken. 

I suppose that this created some sort of a letdown, coming off the fabric store high, because I mentally--and somewhat unconsciously--began looking for another fix. I lingered in my running car for a moment. It slowly occurred to me that Blizzard Yarn and Fiber, one of two newer shops here in Vancouver, was close by. I knew they had an excellent needle selection, and it was on the way home. I needed some pointier needles, after all -- some stilettos! Yes, of course! I couldn't continue my Wendy Johnson socks another minute without better needles. Another reason for another lovely nose-enchanting high!

Armed with those few, thin, grown-up "reasons" to stop by the yarn shop, I headed that way.

Amy Rose protested in the back seat, "I just wanna go hoooooomme!! MOM! I'm so tired...." some familiar little kid whimpering followed, as if extra noise created needed and convincing emphasis on the statement. It was a mix of fake crying and moaning. It was accompanied by some deep leaning to one side in the car seat to be sure I saw the exhaustion. 

"Honey, it will only be a minute. Then we'll head straight home. Promise." 

More whimpering. I was unmoved. I was following the Piper again. This time he just had a different
instrument. 

The 10-minute drive felt longer than ten minutes to both of us. As I parked in the spot right by the
front door, my suffering waned. I dragged Amy Rose from her car seat and we headed into the store; I danced in, Amy Rose plodded.

Once inside, though, Amy Rose's mood lifted. I thought that maybe she heard the Piper, too.

It was Amy's idea to head over to the voices around the corner. We peeked.

And there she was. I thought. Betsy. The woman herself. I knew it was her. I was pretty sure it was her. I had never seen her in real life, though, never heard her voice, never watched her knit as this woman was doing now. Maybe it wasn't her. Maybe I just wished it.

I stared too long. Nervously laughing and chatting momentarily with the other women as the saleswoman who was working that day stood to help me with my needles. I welcomed the escape and we walked back to the front of the store where the needles were kept.

She has no idea, I thought. She doesn't even see me stealing glances back over around the corner. I nervously bought my needles and was poised to walk out of the store, never knowing the truth.

"Mommy, can we stay?" Amy Rose shook me, "Let's look around. Maybe can we sit down at that table and have a rest?" She said this so everyone heard.

Stunned and horrified at the idea of lingering and the possibility of being found out as the stalker I truly was, I stammered, "S-s-s-ure, honey. Let's look over here." Still glancing back at the table, I dragged Amy Rose to the back left corner of the store, as far from the rectangular table as I could get. I feigned shopping for yarn. Everyone at the table had gone back to the business of knitting and visiting, they had no idea of my obsession!

I sneaked around the isles, stealing glances of the Betsy-look-alike and hearing them women talking. After a while, I had to dare to walk past the table to another part of the store, so as not to be accused of shoplifting instead of stalking.

We smiled at the knitters.

There was nothing in the other room.

Okay, I thought, there's no option. We have to pass back by the table. We'll have to sit down. I asked the women unnecessarily, "Mind if we join you?" They are gave an energetic "Sure!" and invited us to a couple of chairs. I inconspicuously pulled out my Betsy McCarthy "Starter Stockinette" socks (seen in the last post) and began working on them.

After too many minutes of small talk, asking the other women questions and trying--but failing--to listen to their warm and interesting responses, I decided to strike. I addressed Betsy. I told her I felt silly, but had to ask if she was who I thought she was. And, after all that self-imposed stress, turns out it was hardly a big deal. Turns out she is the most approachable, humble and sweetest-natured person you could ever hope to meet.

I confessed I was knitting her sock right in front of her, and she just smiled. Of course, she likely knew it all along. Then, she told me about her life here in Vancouver, how she takes walks with a mutual friend of ours (who still lives in her building, in case you were wondering!) and how they take walks through downtown--and knit at the same time. Once, she told me, it took several blocks for her to realize that her yarn ball had fallen and been trailing behind her, unwinding all the way! That last story did it for me: Betsy McCarthy was a kindred spirit to me in some ways.

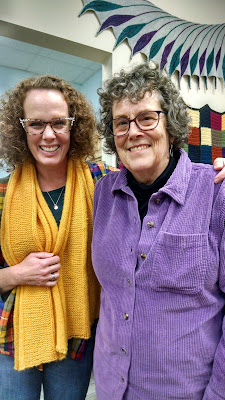
So, I guess, when you meet your heroes, sometimes it turns out okay. Sometimes they are more than you may have imagined, and maybe you even will have something to talk about. Sometimes, they may even let you take a picture with them at the local yarn shop, where it turns out you both buy yarn.